Microsoft Teams
Microsoft Teams brings meetings, chats, calls, teams and files together in one place. At FA.ULisboa you sign in as for Office 365.
You can use Teams in the browser, at teams.microsoft.com, or in the desktop and mobile apps. See all videoconference tools.
How to access
-
Open Teams
Go to teams.microsoft.com or open the app. You can also open it from portal.office.com, in the apps menu.
-
Sign in
Use your FA.ULisboa email (@fa.ulisboa.pt) and your FA.ULisboa account password.
-
Home menu
On the left are the Teams areas: Activity, Chat, Teams, Calendar, Calls and OneDrive.
Create a meeting and send the invitation
-
New event
Go to Calendar and select “New event”.
-
Fill in the meeting
Choose the day and time, add people in “Invite attendees” and, if you wish, attach files. Finally, click “Save” / “Send”.

-
Join
The meeting appears in the calendar. To join, click “Join”.

-
Join now
Choose audio and camera and click “Join now”.

-
During the meeting
In the controls bar you can turn the camera and microphone on or off and share your screen.

Chats
-
New chat
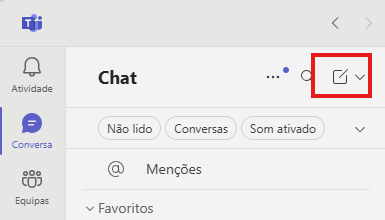
In Chat, click the new message button at the top of the list and type the person’s name or username.
-
Write and send
Type the message in the text box and press Enter or click the arrow. To attach files, click +.

-
Group chat
In a new message, type the names of several participants and press Enter. You can then give the group a name.

Notifications
-
Notification settings
Click Activity (the bell), then the three dots and “Notification settings”.

-
Notification sounds
Turn notification sounds on or off as you prefer.
Create a team
-
Create team
In Teams, select “Join or create a team” and “Create team”.

-
Name and description
Give the team a name and, if you wish, a description.
-
Private or public
Choose Private to talk with a specific group of people, or Public for a topic anyone in the organisation can join.

-
First channel
Name the first channel and select “Create”.
-
Add people
Whoever creates the team becomes its owner: add the team members and, if needed, name another owner.
Institutional teams (for example, for course units) are created by the IT teams.
Join a team
-
Search for the team or use a code
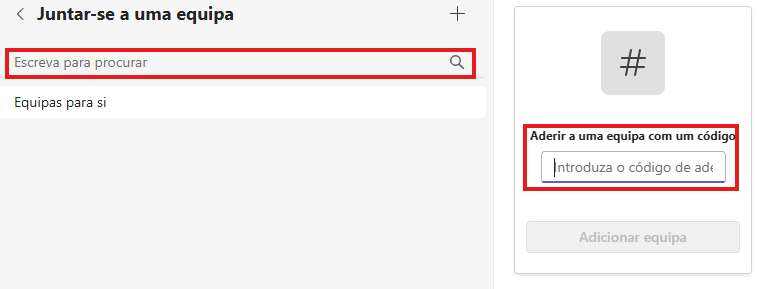
In “Join or create a team” › “Join team”, type the team name in the search or enter the join code.
-
Join the team
You join a public team straight away; for a private team you must request to join and wait for the owner’s approval.
-
Invite someone
In the teams list, under More options › “Add member”, type one or more names and send the request (owners get an alert). You can also copy the team link and send it to the person.
Calls
-
Call
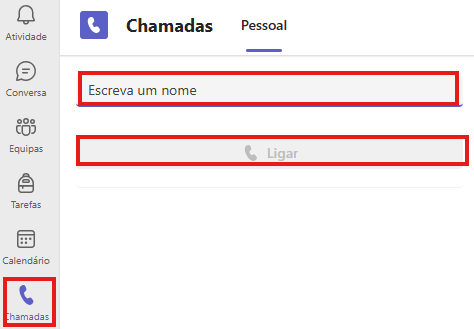
In Calls, type the person’s name and click “Call”.
-
Answer
When you receive a call, a notification lets you accept or decline, with audio only or with video.
-
Add someone to the call
In the call controls, select “Show participants” and type the person’s name in the search.
Files (OneDrive)
-
Find files
Select OneDrive and look in “My files” or “Shared”.

-
Create or upload
To create or upload a document, select “Create or upload” and choose the file.